We've Moved! Visit our NEW FORUM to join the latest discussions. This is an archive of our previous conversations...

You can find the login page for the old forum here.
CHATPRIVACYDONATELOGINREGISTER
DMT-Nexus
FAQWIKIHEALTH & SAFETYARTATTITUDEACTIVE TOPICS
123NEXT
Basics for Successful Indoor Gardening Options
 
Vodsel
#1 Posted : 11/11/2012 3:22:46 AM

DMT-Nexus member

Senior Member | Skills: Filmmaking and Storytelling, Video and Audio Technology, Teaching, Gardening, Languages (Proficient Spanish, Catalan and English, and some french, italian and russian), Seafood cuisine

Posts: 1711
Joined: 03-Oct-2011
Last visit: 20-Apr-2021
In this thread I will compile basic and general information for anyone who wants to start successfully an indoor garden.

The recent policy changes in the Nexus encourage more than ever growing your own entheogens, and as time goes by, the variety of plants we know that can reward the gardener with valuable gifts keeps growing and growing. For all of us who are not lucky enough to live in the countryside, or even to own a good backyard in a friendly climate, the challenge of overcoming these limitations can be discouraging at first; however, growing plants indoors offers some unique advantages.

Inside of your house (in a corner, in a little greenhouse, or inside of a dedicated grow box or closet) a plant has no natural resources to call on, so you must provide for all its needs or it will die. However, precisely that fact gives you the opportunity to control every single condition that intervenes in the plant growth. A proper environment will make any plant thrive happily, and that will solely depend on the time, creativity and resources the indoor gardener is willing to put to work.

When the harvest is something you are specially looking forward to, your motivation is great and the rewards for your time and work are particularly sweet. And you will learn much, much more along the way than you expected.

There are many excellent threads and grow logs in this community about specific plants. In my experience, though, growing for instance an Acacia while understanding well the basic principles of gardening can make as big a difference as extracting an alkaloid when you understand well the basic principles of chemistry; certainly you could go by the book and simply follow the steps in a grow log, same as you could simply follow the steps in an extraction tek. But in the long run, knowledge will improve success rates, help you fix unexpected problems and make the whole experience much more enjoyable, while giving you tools to help others as well.

In this first post I am including a general index of the contents I intend to gather step by step. Chapters will be posted and linked progressively. I will update it as often as I can, and edit and improve it when necessary. This is a long term thread, so please be patient and feel free to contribute, make suggestions and correct any mistakes you can find. Edited parts and contributions will be colored in yellow.

DISCLAIMER: The vast majority of entheogens are not addictive. But as they say, growing them could be Smile


INDEX OF CONTENTS

1. Introduction: What a Plant Needs

2. The Growing Medium: Substrate and Containers
3. Lighting, part I: Basics about Light.
4. Lighting, part II: Measuring Light. Lamps.
5. Watering, part I: H2O and the plant. Frequency of watering
6. Watering, part II: Which Water to Use and How. pH and EC.
7. The Atmosphere: Ventilation, Humidity and Temperature
8. Plant Nutrition, I: The Mineral Nutrients
9. Plant Nutrition, II: Feeding Plants. Fertilizers
10. Seeds and Germination
11. Growth Control, I: Transplanting
12. Growth Control, II: Pruning and Training
13. Propagation: Taking and Rooting Cuttings
14. Basics of Hydroponics
15. Pests, Diseases and Other Hazards


Thread Contributors

Wearepeople
Shaolin
Snozzleberry


Thanks peeps Very happy
 

Good quality Syrian rue (Peganum harmala) for an incredible price!
 
Vodsel
#2 Posted : 11/11/2012 3:23:53 AM

DMT-Nexus member

Senior Member | Skills: Filmmaking and Storytelling, Video and Audio Technology, Teaching, Gardening, Languages (Proficient Spanish, Catalan and English, and some french, italian and russian), Seafood cuisine

Posts: 1711
Joined: 03-Oct-2011
Last visit: 20-Apr-2021
1 - Introduction: What a Plant Needs

Think of a plant as a little magic factory of organic matter. Using light, air, water and nutrients, plants produce stems, leaves and roots, and often also flowers, fruits and seeds.

All plants, from Parsley to Ayahuasca vine, use two physical processes in order to grow:

a - Osmosis, that allows the roots to acquire water and minerals from the growing medium.
b - Photosynthesis, the synthesis of new organic matter by the plant. It's performed in the leaves, and produces glucose and oxygen using the water and the carbon dioxide in the air. This is fueled by the energy of light.

You can imagine the whole process as circular, but for the sake of describing it we can start down and go upwards. So, step by step, this is how it goes:

1 – The thin feeder roots (the tips of the roots) absorb water and dissolved nutrients from the soil.
2 – The water flows upwards towards the thicker transport roots, and from those towards the stem. This flow is continuous, unless there is shortage of water, which will cause the plant to wilt. The reason why the water moves upwards is basically the same why drinking straws work: suction. In the case of plants, the transpiration (evaporation of water in the leaves) produces this pressure inside of the stems that sucks water up.
3 – The water reaches the leaves. During the day time (the light period, in the case of indoor gardening) the undersides of the leaves take carbon dioxide from the air, and thanks to chlorophyll, the plant's green pigment, the following reaction occurs:

CO2 + Water >>>>> (Light) >>>>> Glucose + O2


4 - Glucose is used as the basic brick for constructing new organic matter and also acts as another energy source for the plant. Oxygen is released back into the air.
5 - Some of that glucose is transported downwards towards the roots thanks to conducting vases. The root cells (that cannot perform photosynthesis because generally they are embedded in the soil) produce their own energy through a process called cellular respiration, that uses the oxygen in the air diffused in the soil.
6 – As they grow like the rest of the plant, the roots use that energy to keep searching and pumping water and dissolved nutrients.

Also, the roots serve to anchor the plant firmly in the growing medium. Both roots and stems, besides being transport channels, have a basic structural function as well. Keep in mind the simple fact that all the parts of the plant are essential for this process.

Besides air, water and light, several mineral nutrients participate in the metabolic processes of the plant and are needed for its growth. When we grow a plant in a container, we have to make sure that the right amount of mineral salts can be found in the growing medium. Usually, these are provided by the soil; when they soil is depleted, we have to refill it with new mineral nutrients.

So this is what a plant needs: A place to grow, and enough light, water, air flow and nutrients.

And that's basically the thing. Indoor gardening is about choosing (or creating!) an environment for the plant so she can work the best way she knows. By understanding what she needs, and when she needs it, we can deliver and keep her happy and thriving. And once we start getting something in return from her (which might come as early as the first pair of leaves saying Hi) we'll see that this becomes an interchange, then a relationship, and to some it can rewardingly become a friendship. That's the first step to some day earn a plant ally of your own.
Vodsel attached the following image(s):
1_plant.jpg (61kb) downloaded 3,666 time(s).
 
xantho
#3 Posted : 11/11/2012 8:55:56 AM

DMT-Nexus member


Posts: 190
Joined: 19-Jan-2012
Last visit: 26-May-2017
Awesome thread Vodsel! I will be following your posts with a keen eye and am sure I will gain much knowledge in the process. Even my fledgling indoor gardening endeavours have already offered me the most wonderful rewards and I urge all fellow Nexians to enter into a partnership with a plant. Think not of obstacles, but of opportunities. Start small and feel the creation deepen your experience of being. Much love Smile

"Becoming a person of the plants is not a learning process, it is a remembering process. Somewhere in our ancestral line, there was someone that lived deeply connected to the Earth, the Elements, the Sun, Moon and Stars. That ancestor lives inside our DNA, dormant, unexpressed, waiting to be remembered and brought back to life to show us the true nature of our indigenous soul" - Sajah Popham.
 
Shaolin
#4 Posted : 11/11/2012 9:32:33 AM

Stiletto Stoner

Moderator

Posts: 1132
Joined: 18-Nov-2008
Last visit: 15-Mar-2015
Location: Blazin'
Since I fall under the umbrella of "growing dummies" (cactus died type of skills), I am very excited to see such compilation of posts about growing. Can I hope for some content about different versions of hydroponics too ?

Thank you.
Got GVG ? Mhm. Got DMT ?

Pandora wrote:
Nexus enjoys cutting edge and ongoing superior programming skills of the owner of this site (The Traveler), including recent switching to the .me domain name.


I'm still, I'm still Jenny from the block

Simon Jester wrote:
"WTF n00b, buy the $100 vapor pipe or GTFO"


Ignorance of the law does not protect you from prosecution
 
Ambivalent
#5 Posted : 11/11/2012 10:25:08 AM

DMT-Nexus member


Posts: 336
Joined: 01-Jul-2011
Last visit: 11-Apr-2023
Location: Gaia
Thanks for the thread Vodsel. I am sure there will be alot of great info for everyone here. Its essential to understand plants imo. Again, thanks for your time for compiling this.
 
Vodsel
#6 Posted : 11/11/2012 3:36:32 PM

DMT-Nexus member

Senior Member | Skills: Filmmaking and Storytelling, Video and Audio Technology, Teaching, Gardening, Languages (Proficient Spanish, Catalan and English, and some french, italian and russian), Seafood cuisine

Posts: 1711
Joined: 03-Oct-2011
Last visit: 20-Apr-2021
Thank you all for reading, I hope this will be useful and help all to discover the big possibilities of home gardening.

xantho wrote:
Think not of obstacles, but of opportunities.


That's exactly the spirit, brother. Well put Smile

Shaolin wrote:
Can I hope for some content about different versions of hydroponics too ?


Certainly. Added a Hydroponics chapter to the Index of Contents.
 
Vodsel
#7 Posted : 11/11/2012 3:45:14 PM

DMT-Nexus member

Senior Member | Skills: Filmmaking and Storytelling, Video and Audio Technology, Teaching, Gardening, Languages (Proficient Spanish, Catalan and English, and some french, italian and russian), Seafood cuisine

Posts: 1711
Joined: 03-Oct-2011
Last visit: 20-Apr-2021
2 - The Growing Medium: Substrate and Containers


2.1. – Basics for the Growing and Rooting Medium

Plants have requirements of the growing medium, or substrate, they are growing in. The medium serves several basic functions:

- Giving physical growing space and anchorage for the root system.
- Holding water.
- Providing a correct supply of air for the roots to breathe.
- Holding the right concentration of mineral nutrients.
- Mantaining an adequate pH level for the roots to perform their function.


Giving the plant a medium to grow that satisfies these requirements is essential. A great lighting setting, controlled atmosphere and top quality fertilizers will be pointless if the medium where the plant is growing is poor, too compact or waterlogged. A lot of the problems that can appear when growing a plant indoors are originated in the rooting system due to a bad soil mix, and since the symptoms are not apparent in plain sight, once the problem becomes obvious it might be difficult to solve. Choosing and preparing the medium properly in the beginning will prevent a lot of hazards. The medium is the ground to build the house on.

Whatever medium you pick to start your indoor grow has to be sterile. We don't want detrimental bacteria, insects or fungi to prey on our plant. If you cannot use new, sterilized medium, and you prefer to recycle soil, you can sterilize it yourself by pouring it in a tray (or inside of a roasting bag) and placing it in the oven with a 80+ºC setting for half an hour, and letting it cool completely afterwards. However, to be in the safe side I would not recommend using soil acquired outdoors. If you ever want to add to your growing medium pebbles or sand you picked yourself, sterilizing them by boiling or heating is mandatory. Pests and fungi spread like the plague, and again, a little care in the beginning will spare you lots of trouble. Specially in the early stages of growing.

The pH, as you probably know, is the measure of acidity or alkalinity in a substance. A correct pH allows the roots to acquire the needed amounts of water and minerals thanks to osmotic exchange, and it should be by default around neutral values. That means around pH 7. Some plants prefer slightly sweet (alkaline) soils, and others prefer slightly sour (acidic) soils, but if you cannot find specific requirements for the plant you intend to grow, the safe bet is keeping it neutral. Other than particular needs of some plant species, it might be a good thing to double-check the pH in your growing medium if your plants show nutrients problems or their growth appears stunted with no other apparent reason. You can buy many types of pH testers in garden centers. If you ever want to adjust the pH value of the soil, you can raise it slowly by adding -for instance- lime to the soil, or lower it by adding sulphurs. However, keep in mind that changing the pH on the way might take a long time and will require thorough measuring and following, so if you learn that you plant will enjoy a particular range of pH, and you want to be precise with that, it makes sense to adjust it before planting. I will cover further the pH and EC (electro-conductivity) topics in the Chapter 6.

Your growing medium also needs to have a good drainage. That doesn't simply mean to have a proper set of holes in the bottom of your container, so the excess water will drip off instead of accumulating in the bottom; it also means that the consistency of the soil must be right for the water to drain downwards (unless you are watering from below, of course). If the medium is too compact, it will not contain enough diffused air for the roots to breathe. And if it's waterlogged due to poor drainage, you are creating the perfect environment for harmful fungi and algae to develop, produce root rot and take down the roots and consequently the whole plant.

Good drainage also requires that, in the case of soil-based mediums, the soil is loose enough. When repotting, or when filling your container with substrate, avoid pushing it down or compacting it too much. I usually fill the container with new mixed soil loosely, and then hit firmly the base of the container against the work surface a couple times. That is enough for slightly packing the soil mix.

The first choice to make when picking a growing medium is whether you prefer soil or soilless mediums. They both can work well, and have their own advantages and disadvantages.


2.2. – Soilless Mediums

Soilless mediums are very porous, so they tend to ease water drainage and give good oxygenation to the roots. Also, most of them are inorganic by nature, so unless you are recycling soilless substrates from previous growings, they are a sterile medium.

The downside, if you want, is that they do not contain any nutrients by themselves. So you will need to provide for every single mineral need of the plant from the beginning. Of course, if you know how to feed the plant properly, this can be seen as the opportunity to control completely the mineral diet of the plant.

Another disadvantage of soilless mediums is that they are non-renewable resources due to their origin. Also, they can release small amounts of potentially harmful powder if you breathe it. However, a little care when handling them should prevent any problems.

- Perlite is a light material made out of volcanic glass that has been expanded by heating. It has a high permeability, and its granulated texture allows a good airflow inside of the growing medium.

- Vermiculite is produced by heating certain silicate rocks, and is commercialized in a small exfoliated texture. It's one of the most common substrates for growing mushrooms, and it's a good choice for seed germination with little water, due to its good moisture retaining properties. There are commercial soilless mixes with vermiculite and pine bark compost that work great for roots development and also do a good job at retaining air, nutrients and water, releasing them as the plant requires them.

Perlite is superior to vermiculite for aeration, but both retain water and nutrients well. A mix of two parts of perlite per one part of vermiculite constitutes an effective and affordable rooting medium; Although, since it is a very light medium, larger plants might be more prone to falling due to lack of support and might require assistance (such as using a stake) in order to stay straight.

Both perlite and vermiculite are regularly used as an addition to soil mixes to prevent soil compaction, increasing the porosity and balancing the water retention of the soil. Even if you intend to use a soil medium for your plants, either of them can be a useful addition to your gardening stuff.

- Rockwool, introduced in the eighties, is generally made of a combination of volcanic rock and limestone. It can be found in granulated form, but gardeners use it most frequently in the shape of cubes, and it's quite efficient for hassle-free indoor propagation of cuttings. While rockwool cubes are easy to handle and control, have a good texture for root development and eliminate much of the mess of gardening, they are not free of disadvantages. When dry, rockwool can be irritating to the skin and release fine powder particles that can be harmful if you breathe them, so you either have to wet them a little before working or use gloves and goggles. Also, rockwool is more expensive than other materials, but the fact it's easy to reuse can make it economical in the long run.

There are other options for soilless mediums like expanded clay pellets or coconut fiber. They are more frequently used in hydroponics systems, and I'll talk about them further in the chapter about hydroponics.


2.3.– Soil Based Mediums

We can divide soil based mediums in two main categories:

- Loam-based soils are stable and very efficient at holding water and nutrients, but they're quite heavy, so they might be a good choice for plants that will stay in the same pot for a long time, and for older, heavier plants that need the extra weight to stay firm in place.

- Peat-based soils are lighter, cleaner and easy to work with, but they dry out faster and nutrients wash through them more quickly.

The most often found soil preparations in the market are peat-based compost mixes. If you wanted to prepare your growing medium entirely by yourself, a basic medium can be made mixing peat moss, compost including porous vegetable fibers like pine needles, bark or coir, and in cases where the plant will like it (or if you want extra drainage and ventilation) you can also add coarse sand. Succulents, cacti and some hardy perennials enjoy a part of sand in their compost soil mix.

For starting, any good gardening pre-mixed compost will work well. But in any case, avoid El Cheapo brands, since they might contain molds and contaminants. Spending a few extra dollars, or taking the time to mix the compost soil yourself, will definitely pay off in the end.

If you decide to try and mix potting soil yourself, prepare a clean container and lightly spray the mixture with water before stirring. Otherwise, you might produce a lot of dust and your lungs wouldn't know what to do with the excess minerals.

In either case, besides which basic growing medium you decide to use, is highly recommended to include a material to improve drainage and airflow. The most common options include perlite, vermiculite, charcoal and pebbles.

To give a simple alternative, a good all-purpose indoor soil mix for starters might be something like this:

- One third compost.
- One third peat moss.
- One third perlite/vermiculite.

To that you might add right away a couple spoonfuls of lime per gallon of compost, if you want pH neutral substrate, in order to raise a little the pH of the mix (since peat moss is slightly acidic) and some of your fertilizer of choice (worm castings, dilluted liquid fertilizer, etc.) following the proportions suggested in the package.

I have often prepared this as a base mix, and then adjusted it according to the particular needs of the plant I am starting.

Keep in mind that if you decide to use a pre-made good soil mix, it will contain enough nutrients for the first stages of plant growth. Avoid fertilizing at all in these first stages (say, the first two months at least) or you will burn the plant with excess minerals; we'll discuss this in the chapter dedicated to Nutrients.

As you can see, every available option has its own set of pros and cons. By being aware of them, and keeping in mind any specific preferences of the plant you want to grow, you will be able to make full use of the advantages and compensate the disadvantages with minimal gardening work.


2.4.– Growing Containers

Thankfully, the choice of container for an indoor grow is much simpler than the choice of growing medium, and it has a lot to do with what the gardener finds attractive; of course there is always a few factors to consider when choosing the right container other than interior design.

- Materials. Plastic is light, cheap and practical. Clay is also an option, and since it is porous, unlike plastic, it contributes to the breathing of the rooting medium; but it's also heavy and it can accidentally shatter when falling or being knocked over, resulting in a mess and a stressful time for both the plant and the gardener. In my opinion, clay containers are good for plants that are well developed, stabilized and will spend a long time in the spot with no need of repotting or extensive manipulation. Other than that, stay with plastic.

- Colors. They can have their influence besides how nicely they fit in your house and grow space style. Dark colors absorb more light radiation and hence contribute to preserve the soil warm, so they are preferable for indoors. Clear and white pots, with higher reflective properties, are more suitable for sunny outdoors, where the sun rays can heat up the container too much and dry the soil and roots faster.

- Size. The larger a pot is, the more room for the roots to grow and pump the goodies to the stem; but, unless you have a long lived plant that does not enjoy being transplanted, the rule of thumb is to start with small containers and move progressively the plant to larger ones, as the roots develop and the plant becomes root-bound. The reason for this is that roots tend to grow outwards looking for stability, and allowing them to collect around the edges of the container maximizes the effectiveness of watering and ensures a more efficient root mass when the plant is moved to a larger container. Also, transplanting is much easier once the plant is pot bound.

- Drainage. You need several good drainage holes in the bottom of the container, so the excess water will not stay there creating a good place for fungi and diseases to thrive. If the container you have has little drainage holes, do not hesitate to add more with a piercing tool or a hot knife or needle. If you add the convenient collecting plates under the containers, make sure that the drained water does not stay there either.

Before using them, you should sterilize containers with a 10% bleach solution (that is, 100 ml of chlorine bleach per every liter of water). This is particularly important if they containers have been used before. The remnants of dirt and roots may host insects, disease and fungi that won't be visible, and seedlings or cuttings are very vulnerable to those. If you are using clay or metal pots, you can also sterilize them by placing them in the oven for a few minutes at 80ºC (around 180ºF).

And this is all at the moment. I will keep expanding and editing the chapter whenever necessary.

Thank you for reading!
 
wearepeople
#8 Posted : 11/11/2012 5:48:38 PM

DMT-Nexus member

Senior Member

Posts: 1843
Joined: 28-Jun-2012
Last visit: 20-Jul-2021
Vosdel,

This is amazing!

I'll be putting up posts that can hopefully be integrated into different sections.

Plants are family tradition for me. From germination, transplanting, organic fertilizers, natural (safe) pesticides, grafting, lighting, and more!


YES!!!! I'm so excited for this thread!
+ ---- + ---- + ---- + ---- + ---- + ---- + ---- + ---- DMT Nexus Research ---- + ---- + ---- + ---- + ---- + ---- + ---- + ---- +
 
zombicyckel
#9 Posted : 11/11/2012 6:09:58 PM

Armchair activist


Posts: 521
Joined: 17-Sep-2011
Last visit: 05-Aug-2016
Some good info in here!
 
Vodsel
#10 Posted : 11/11/2012 8:58:57 PM

DMT-Nexus member

Senior Member | Skills: Filmmaking and Storytelling, Video and Audio Technology, Teaching, Gardening, Languages (Proficient Spanish, Catalan and English, and some french, italian and russian), Seafood cuisine

Posts: 1711
Joined: 03-Oct-2011
Last visit: 20-Apr-2021
wearepeople wrote:
I'll be putting up posts that can hopefully be integrated into different sections.

Plants are family tradition for me. From germination, transplanting, organic fertilizers, natural (safe) pesticides, grafting, lighting, and more!


Contributions are definitely welcome!

Any posts will be included and linked in the first index of contents. In order to keep repeated information to a minimum and to avoid double work, it might be a good idea to add extra contents once every main chapter has been posted. But again, it might take a while for me to do all the write up, so feel free to add useful information in any order if you want.

Thank you for your interest Smile


entheogenadvocate
#11 Posted : 11/11/2012 9:25:28 PM

DMT-Nexus member


Posts: 412
Joined: 24-Dec-2009
Last visit: 02-Jan-2021
Location: United States
Thank you so much for taking the time to make this thread, Vodsel! As Shaolin stated, this is perfect for "growing dummies" such as myself. It's like you read my mind and decided to give me an early Christmas present, so again, I thank you Big grin
All posts are completely fictional and for educational purposes only
 
Lichen
#12 Posted : 11/12/2012 4:28:14 AM

DMT-Nexus member


Posts: 333
Joined: 07-Nov-2009
Last visit: 06-Oct-2022
Excellent Vodsel! I'll be following this closely Smile
I am a piece of knowledge-retaining computer code imitating an imaginary organic being.
 
nen888
#13 Posted : 11/12/2012 5:02:23 AM
member for the trees

Acacia expert | Skills: Acacia, Botany, Tryptamines, CounsellingExtraordinary knowledge | Skills: Acacia, Botany, Tryptamines, CounsellingSenior Member | Skills: Acacia, Botany, Tryptamines, Counselling

Posts: 4003
Joined: 28-Jun-2011
Last visit: 07-Mar-2024
..thank you for this thread!..very timely, and with no personal experience of indoor growing i am finding it fascinating..Thumbs up
 
Dante
#14 Posted : 11/12/2012 5:13:58 PM

DMT-Nexus member


Posts: 465
Joined: 01-Dec-2009
Last visit: 15-Apr-2020
Vodsel, thank you so much for putting together all this useful info! Ill soon start my own ethnobotanical garden Smile
Listen to a man of experience: thou wilt learn more in the woods than in books. Trees and stones will teach thee more than thou canst acquire from the mouth of a master. St. Bernard
 
Vodsel
#15 Posted : 11/12/2012 10:56:23 PM

DMT-Nexus member

Senior Member | Skills: Filmmaking and Storytelling, Video and Audio Technology, Teaching, Gardening, Languages (Proficient Spanish, Catalan and English, and some french, italian and russian), Seafood cuisine

Posts: 1711
Joined: 03-Oct-2011
Last visit: 20-Apr-2021
3 - Lighting, part I: Basics about Light

Proper lighting is one of the pillars for successful gardening. For any beginner indoor gardener, lighting usually poses the first Big Question as soon as we want to start getting serious with our job, or as soon as we realize that we cannot fully rely on the Sun.

In this thread we will primarily discuss artificial light. Of course, indoor gardening and sunlight are by no means mutually exclusive. Many indoor gardeners, including myself, take advantage of as much sunlight as they can get and their plants can use, and there are multiple aspects to keep in mind when using natural light wisely indoors: the positioning of the plants (by south facing windows in the northern hemisphere for the longest light periods, or by east or west facing windows to capture only the more gentle direct sunlight times in the morning or the afternoon), the seasonal changes in sunlight, the particular needs of every plant species (some plants devour as much direct sunlight as they can get, while others can barely tolerate the heat irradiated by the Sun), and the side effects of sunny spots in other factors like temperature or humidity.

Many successful strategies involve a combination of both natural and artificial light, taking advantage of the abundance of light and warmth in spring and summer and retreating towards the safety of a good indoor setup during the cold months.

However, since the choice and setup of lights for indoor gardening is often complicated for the beginner (and for the non-beginner as well, actually) particularly because lamps, ballasts and other hardware can be expensive and their effects in the grow are so important, in this thread I will focus on basic indoor concepts and alternatives for artificial lighting. If you prepare a good setup of lights that fully covers the needs of your plants, the weather and the absence of enough natural light in your space won't ever be a limitation, and you can always keep your plants fully and effectively fueled for full growth.


3. 1. – A Little About the Physics of Light

Visible light, or visible spectrum for the human eye, is the range of electromagnetic (EM) radiation with wavelengths comprised between 390 and 750 nm (1 nm, or nanometer, is the one billionth of a meter). The range of EM radiation better used by the plants can be rounded between 400 and 700 nm. This range is called the Photosynthetically Active Radiation (PAR) zone.

The relation between wavelength and frequency in physics goes like this: Frequency = Speed / Wavelength. Light, as all EM radiation, has a constant absolute speed, so the larger the wavelength, the smaller the frequency; EM wavelengths of around 400 nm have a higher frequency and correspond to the blue side of the visible spectrum. Likewise, EM wavelengths of around 700 nm have a lower frequency and correspond to the red side of the spectrum.

Each color in the spectrum promotes a different type of growth in the plants. Inside of the PAR range, the most effective colors for photosynthetic response are in the blue and the red range.

Generally, blue wavelengths are more effective for the vegetative growth stages (see below, under Photoperiod) and red wavelengths are more effective for the flowering or fruiting periods.

Green light, with wavelengths around 550 nm, is used a little less effectively due to the fact that chlorophyll, the green pigment in the plant, reflects a larger part of it (hence the green color in most healthy leaves).

Although light behavior shows a wave/particle duality in physics observations, we usually refer to light as a stream of particles called photons. This is relevant because the amount of energy carried by a photon is inversely proportional to its wavelength (the shorter the wavelength, or the higher the frequency, the more energy a photon carries). We'll see that this can be very important when it comes to designing efficient lighting systems.


3. 2. – Light, Photosynthesis and Plant Growth

As we described in the Introduction Chapter, light is the energy the plant uses to catalyze the reaction of photosynthesis: CO2 + H2O > Glucose + O2. The energy of the captured photons is used to break the water molecules into hydrogen and oxygen, and to create all the organic compounds needed for development. Photosynthesis is the engine that keeps the plant working, and its in our interest to keep it in its optimal levels for a most productive growing.

Insufficient levels of light slow down growth; plants with prolonged light defficiency will eventually turn pale, leaves yellowing (due to the low production of chlorophyll) and will become elongated in their search of light, which also contributes to the overall weakness of the plant. Phototropism is the natural instinct of the plant to grow towards the source of light, trying to capture as many photons as she can. A plant that receives only lateral light will progressively change its structure to face the light as directly and closely as possible. That is unnecessary stress, so keep it in mind when placing your growing lights to avoid growing lopsided plants, since these will have a weaker, unbalanced structure.

Of the three input factors in the equation (CO2, H2O and light) photosynthesis is limited by the one who finishes first. This is a very important point; you could have the best lighting in the world, but if there's no CO2 available, the plant will not grow. Our assumption in this post is that we are doing well our job and air and water are not limited, so our efforts with the lights will pay off. Once again, remember: any extra money spent in good lighting devices can be a waste if your plants are not receiving good air flow or are not properly watered.


3. 3. – Photoperiod

The photoperiod is the relationship between the duration of the light period and the dark period. In plants growing outdoors under natural sunlight, the photoperiod is a function of the duration of the day (24 hours in our spaceship) and the seasonal changes in hours of light. In the northern hemisphere, the peak in hours of light happens in the summer solstice, and the shortest light period in the winter solstice.

All of the seasonal cycles of plants like flowering or fruiting are triggered by changes in the photoperiod. When gardening indoors, it's the gardener who decides the photoperiod (the total duration of the cycle, and the hours of light and darkness in the cycle) by plugging the lights to a timer – and this is one of the exciting possibilities of indoor.

Plants are often divided into several categories related to the relation between the hours of light they need in order to enter flowering and the particular critical day length or critical photoperiod of the species. We have long-day plants, that flower when the day length exceeds their critical photoperiod, short-day plants, that flower when the day length becomes shorter than their critical photoperiod, and also day-neutral plants, which flower regardless of the day length. Of course it's good to know where do our plants fit in, if we intend to obtain a specific result with our programming of the lights.

Vegetative growth is the period starting after germination, and before the plant enters sexual maturity and starts flowering. Many plants will stay in this vegetative growth stage as long as an 18-to-24 hour light and a 6-to-0 dark photoperiod are mantained since germination. As a rule of thumb, eighteen hours of light per day will give most short-day plants all the light they need to sustain vegetative growth. During this stage, all the energies of the plant are devoted to growing. This is relevant for the gardener interests, since if we are growing to harvest leaves, we don't want the plant to start flowering to soon and spend a lot of resources to produce flowers. If you intend to grow a plant in order to be able to take cuttings for further propagation, you should ideally keep it under the vegetative growth state. Technically, you could do that indefinitely; although allowing the plant to complete its cycle is beautiful and has its own rewards.

As you will know, cannabis indoor growers, for instance, program photoperiod in order to make the plants flower. In short-day species like cannabis, flowering is most efficiently induced by sensibly reducing the hours of light, moving from 18 or more hours of light per day towards 12 hours of light and 12 hours of continuous darkness in a 24 hour day. Note that the darkness has to be complete and uninterrupted. Gardening indoors allows you to control this efficiently, avoiding the light contamination that often occurs in inhabited areas.


Since this post might be humongous if I continue, I will complete the information about light in a second post about ways of measuring light and related units, and some information about Lamps.
 
Vodsel
#16 Posted : 11/14/2012 10:18:22 PM

DMT-Nexus member

Senior Member | Skills: Filmmaking and Storytelling, Video and Audio Technology, Teaching, Gardening, Languages (Proficient Spanish, Catalan and English, and some french, italian and russian), Seafood cuisine

Posts: 1711
Joined: 03-Oct-2011
Last visit: 20-Apr-2021
4 - Lighting, part II: Measuring Light and Lamps


Ok, so – Which lamps do you need for an indoor garden? How many of them? And where to place them?

To make sure that any money and time spent in lighting setup will pay off, and that no significant amount of energy will be wasted once it's plugged in, it's essential to understand how light is measured and what do lamp parameters mean.


4.1. – Measuring Light

Ok, so here's a first truism: In order to deliver to your plants at least as much light as they need to sustain reasonable growth (and ideally you should give more than that so they grow lushly) you have to figure out how much light do they need.

The first requirement for that is to have a measuring unit for light. Often, for photography, the unit for measuring light intensity is the candle; for our gardening purposes, and to agree with the most common parameter in light bulbs available commercially, we will use as our measuring unit the lumen.

In photometry, the luminous flux (or luminous power) is the measure of the perceived power of light. Since the PAR range in the plants agrees with the sensitivity of the human eye, we can rely on the measure of luminous flux for our plants.

The lumen is defined as the amount of luminous flux emitted across a solid angle of one steradian by a light source of one candle of intensity.

Don't be scared, we are going to get practical.

Of course, every plant will have her own ideal light needs, but in this thread we are trying to speak as generally as possible, so I will leave a reasonable rule of thumb for general purposes. You should aim to deliver at least 20,000 lumens per square meter of growing space (roughly equivalent to 2,000 lumens per square foot) for plants sustaining vegetative growth, and at least 30,000 lumens per square meter (about 3,000 lm per square foot) if you are growing for fruits, flowers or seeds. Remember that the amount of energy contained in a long wavelength (red range) photon is smaller than the amount of energy contained in a short wavelength (blue range) photon, so you need to make up for that difference by delivering more photons to the plant, and that means more lumens per surface unit.

Now let's take a look to the alternatives we have to achieve this.


4.2.– Lamp Parameters

I'm compiling here different wiki definitions for all the relevant parameters that you will find in lamp specifications.

Potency: Is the measure of the consumption of energy by the lamp, measured in Watts.

Luminous Flux: Is the total output of the lamp, measured in Lumens, when working at full wattage power.

Efficacy: It's the measure of lumens the lamp delivers per every Watt of power consumption. Low efficacy means high production of heat (waste of energy). In order to maximize the results of energy consumption, and considering that gardening lamps will be working for a long time, it's important to aim for high efficacy values. The measure of efficacy, then, is expressed in Lumens/Watt (lm/W)

Color Temperature (CCT) – It's the temperature needed for an ideal black body radiator to emit light of a comparable hue to that of the light source. It's measured in degrees Kelvin (K). For our practical purposes, it will be enough to remember that the CCT rating is an indication of how “warm” or “cool” the light source is. CCTs of up to 3000 K correspond to warm colors, and CCTs of 5000 K and more correspond to cool colors.


Color Rendering Index (CRI): Measure of how well colors can be perceived using light from a source, relative to light from a reference source such as daylight. By definition, an incandescent lamp has a CRI of 100. Real-life fluorescent tubes achieve CRIs of anywhere from 50 to 99. Fluorescent lamps with low CRI have phosphors that emit too little red light. Skin appears less pink, and hence "unhealthy" compared with incandescent lighting. Colored objects appear muted. For example, a low CRI 6800 K halophosphate tube (an extreme example) will make reds appear dull red or even brown. 

Spectrum: It's the portion of the EM spectrum that can be found in the light produced by the lamp. A good spectrum for gardening delivers plenty of light in the wavelength bands that are optimally used by the plants.


4.3.– Lighting Technologies: Types of Lamps

In the last three decades, indoor gardening and horticulture have been revolutionized by the advances in lighting technologies. Here's a summary of the current standard types of lamps. Please note that figures are approximated, and that generally efficacy ranges relate to different wattage powers and different chemical materials within the same category of lamps.


Incandescent Lamps

Wattage Range: 5-500 W
Efficacy: 4-20 lm / W
CCT: 2400-3400 K
Spectrum: Continuous
Lifetime: 2-2,000 hours

Incandescent light bulbs produce light by heating a filament with electric current until it glows. In this family you can find the classic tungsten incandescent bulbs and the halogen lamps. They are cheap but very inefficient, since most of the electric energy they use (95% or more) is converted to heat, and only a little fraction is converted to light. Their spectrum is not good for gardening either. Unless you want to grow plants that have extremely low light requirements (such as certain types of ferns), and you want to make them sweat while wasting a lot of energy, these types of bulbs have no place in an indoor garden.


Fluorescent Lights (FLs)

Wattage Range: 15-80W (up to 250W in Compact Fluorescents)
Efficacy: 50-100 lm / W
CCT: 2700 – 5000 K, depending on the type of fluorescent
Spectrum: Combined (Continuous from the phospor coating, plus the line spectra of the mercury gas discharge)
Lifetime: 8000-20,000 hours

Fluorescent lamps use electricity to excite gas vapors, producing them to emit short wave ultraviolet light that causes the coating in the tube to fluoresce. The coating produces the visible light, and different types of coating deliver different qualities of light. The overall spectrum of a fluorescent results from the combination of the light emitted by the vapor inside of the tube and the light emitted by the phosphorescent coating.

FLs have much higher efficacy and efficiency than incandescent lamps; they require 25-30% of power to produce the same light as an incandescent. Different types of FL lamps will deliver different CCTs and color dominances, so the choice of lamp should be related to the type of result you want to achieve.


Cool White and Daylight FL produce a small amount of light in the red range and a larger amount in the blue range, what makes them good for starting seeds or for leafy plants that will not be encouraged to flower.

Warm White FL deliver primarily red wavelengths and less blue light, so they are not ideal for vegetative growth and are more often used to supplement Cool White FLs.

There is also another difference within tubular fluorescent bulbs. You will often see FLs labeled as T5, T8 or T12. The letter T indicates the Tubular shape of the bulb, and the number following represents the diameter of the bulb in eighths of an inch. The standard fluorescents use T12 bulbs, and these are fine for seedlings and early stages. However, if you intend to use FL seriously for growing, you should look for the T5 fluorescent grow lights. Those are much more efficient than the regular wider FL bulbs.

Update: Let's make it a T4. More efficient, thinner fluorescent lamps have become available. I've added a couple 20W T4 6400K tubes to my indoor space, for germination and vegetation, and I'm very pleased with the results.


Compact Fluorescent Lights (CFLs) use the same technologies, but their tubes are curved and folded to fit into the space of an incandescent bulb, and include a compact electronic ballast (see 4.4 below) in the base of the lamp. This architecture allows much longer tubes, hence larger power inputs.

They are usually available either in full-spectrum bulbs, that produce a vast range of light wavelengths, and cool-spectrum bulbs that mostly produce blue light. In spite of being placed in a regular incandescent fixture, they also as FLs burn much cooler than incandescent lights, so they can be placed very close to the plant without risks of burning the leaves.


High Intensity Discharge Lamps (HID)

HID Lamps produce light with an electric arc between two electrodes housed inside of a alumina or quartz tube, filled with gas and metal salts. They are more efficient than fluorescent lamps, producing more light per unit of electric power consumed. That makes them a good choice for illuminating larger areas, or simply to provide an overall higher light output using a single lamp instead of multiple fluorescent tubes. However, you should always do the maths to see which combination is better for your interests.

They produce light in discrete lines or bands, used in spectral analysis to identify or fingerprint the material producing the light. Different types of HID lamps are classified depending on the elements used inside of the tube.


a.- Mercury Vapor Lamps (MV)

They are the less expensive among HID lamps. Unfortunately, they provide the worst spectrum for plant growth, so they are not recommended for indoor gardening.


b.- High Pressure Sodium Lamps (HPS)

Wattage Range: 35-1000 W
Efficacy: 55-140 lm / W
CCT: 1800 – 2200 K
Spectrum: Broadband
Lifetime: 10,000-40,000 hours

Unlike Low Pressure Sodium lamps (extremely efficient light sources, often used in street lamps but not useful for gardening due to their narrow yellow light spectrum), HPS lamps emit a wide spectrum more concentrated in the range of red/orange light, so they are particularly useful for the fruiting and flowering stages of plant development.

They show overall a little advantage regarding other HID lamps in terms of efficiency, light output and lifespan, although as said they do have a slightly more specific gardening profile.


c.- Metal Halide Lamps (MH)

Wattage Range: 70-1500 W
Efficacy: 75-125 lm / W
CCT: 3000 – 20,000 K
Spectrum: Quasi-continuous
Lifetime: 6,000-20,000 hours

MH lamps produce an intense white light output, closer to sunlight than any other HID source, have a good CRI measure, and same as FLs, CFLs and HPS, they are extensively used in indoor gardening. They show a wide spectrum with a strong presence of blue wavelengths, which makes them overall good and specially suitable for vegetative growth. Traditional MH lamps use a quartz arc tube and can also be referred to as QMH.


Also, CMH lights are definitely worth a mention. Thanks to Shaolin for the heads up.

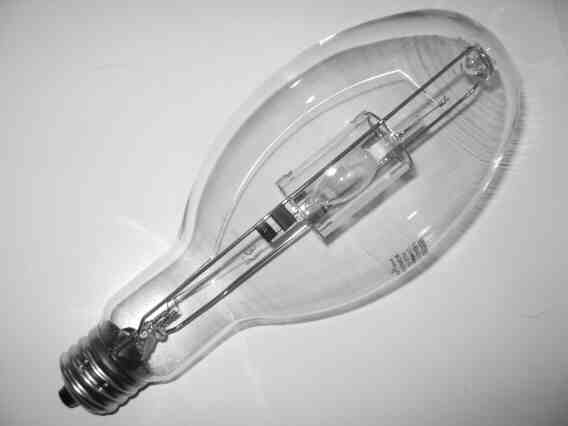
Ceramic Metal Halide (CMH)

Wattage Range: 20-400W
Efficacy: 80-117 lm / W
CCT: 3000 - 5200 K
Spectrum: Quasi-Continuous
Lifetime: 6,000 - 25,000 hours

CMH lamps, also called CDM (Ceramic Discharge Metal Halide) lamps, combine the ceramic arc tube of HPS lamps with the metal salts used in Metal Halide traditional lamps to achieve a very hot plasma illumination source, thanks to the high resistance of the arc tube material. The light produced by CMH lamps presents an excellent CRI of up to 96, with a bluish tint remarkably similar to daylight, that supplies an excellent spectrum. Their performance values make them an optimized cross of HPS and MH technology.

Snozzleberry, in an older thread, wrote:
If you're going HID, you should go for Ceramic Metal Halide...They put out more lumens, a broader spectrum that's much closer to the sun's light, burn longer, retain luminosity longer, are cheaper than MH or HPS bulbs, throw less heat, throw more photosynthetically active photons...the list goes on.

Only downside is they currently max out at 400 watt...But use 2 400 watt CMH and I guarantee you'll have better result than a 1000 watt MH.


Warm white CMH lights with lower CRI values are also available. It's recommended to operate both cool and warm CMH lamps with digital ballasts, usually the same type of ballast suitable for high wattage HPS lamps.


Light Emitter Diode Lamps (LEDs)

Wattage Range: Varies
Efficacy: 10-110 lm / W
CCT: Various ranging from 2700 to 6000 K
Spectrum: Line plus phosphor
Lifetime: 50,000-100,000 hours

A LED lamp is a lamp made with semiconductor light sources. LED technology is in continuous development, and some of the fancy features of LED lighting include very low heat dissipation, good efficacy and highly customizable lamp setups, since individual LEDs can deliver virtually any discrete light wavelength depending on the materials used. There's many LED lamp fixtures in the market that include combinations of LEDs of different saturated colors, trying to attain a good result for all-purpose indoor gardening. The total power of LED lamps equals the sum of the power of all the individual LEDs included in the fixture.

LED technology is complex and covering it in detail currently exceeds the purpose of this post; it's certainly an option to consider, and it becomes more solid every year, even if the prices of good LED lamps are still expensive when compared to other alternatives. If you intend to go the LED route, you will need to do some research. So far, I can tell you that highly efficient LED lamps require individual LEDs with power higher than 1 watt, preferably 3 watts or more. Be careful with the cheap LED systems, since a lamp with 200 LEDs of 0,5 W each will deliver quite worse results than a lamp with 30 LEDs of 3 W each.


4.4.– Ballasts and Lighting System Output

In order to work, fluorescent lights and HID lights require a ballast, a device that regulates the electricity used by the bulb. Lots of pre-assembled lamps like standard fluorescent fixtures and CFL lamps already include their own ballast, so those can be plugged right away to your current supply, but if you want to put together a fluorescent fixture yourself (which will save you some money, and it's pretty easy) or if you intent to use a HID lamp, you will need to purchase a ballast.

There are a couple of different types of ballasts you can choose. Electronic ballasts virtually eliminate flicker, operate quietly, and maximize energy efficiency by reducing heat radiation. Reactive or magnetic ballasts are cheaper but more cumbersome, and their operating hum might be annoying.

It is important that the light and ballast are compatible in voltage and current, so make sure to match the bulb with the ballast. Your hardware store guy can easily help you with this. Also, it's convenient to get a ballast that can deliver at least the wattage power of the lamp you intend to use. If you plug a 150W ballast to a 250W lamp, you're asking the ballast to deliver more power than it's designed to give, and the ballast will end up burning. So if you have a 150W ballast, you could plug to it a 150W lamp, or two 75W lamps, or just one 100W lamp, for instance.

Besides these compatibility bits, the overall efficacy (lm/W) of your lighting setup will be determined by the combination of lamp and ballast. The ballast factor (BF) is the measured ability of a particular ballast to produce light from the lamp (or lamps) it powers. The BF is a coefficient which returns the actual output in lumens of the lamps powered by it.

For example, if you have two fluorescents that deliver 3500 lumens each, and you assemble them in a fixture using a ballast with a 0,90 BF,

3500 lumens x 2 lamps x 0,90 BF = 6300 lumens


That would be the actual light output of your fixture.

Note that ballast factor is not a measure of energy efficiency. A lower BF will reduce the lamp lumen output, but it also consumes proportionally less input power, since the ballast only delivers what the lamp can consume, limited by its own BF coefficient.


4.5.– Positioning lamps

Ok. So now you have chosen a lamp, a proper ballast if necessary, and you count with an overall light output of, say, 15,000 lm. But the fact you have 15,000 lumens coming out of your lamps doesn't mean that your plants are receiving the whole 15,000 lumens of light. Of course, you want to make sure that as many of those precious lumens as possible will eventually hit a hungry leaf or stem, so the rest of your job is to maximize the number of photons that hit the spot without causing any trouble in the process.

The first potential source of trouble, obviously, is the physical electric safety of your setup. That means using plugs and cords in good shape (preferably new ones) and making sure that your hardware is suitable to carry the amount of power you are intending to use. You do NOT want to overload power lines or to smell any hint of burning plastic. Ask in your hardware store to make sure you are good to go if you have any doubts. To be in the safe side, I wholeheartedly recommend to purchase new plugs and cords if you are going to use a significant power input. Also, making sure that the wall appliances are okay and that your electricity supply will handle your plants needs with no problem, on top of the rest of energy requirements in your house.

Make sure that you hang any lighting devices safely, and double-check every plug and connection before you actually place any plant on the shelf under the lights or inside of your growing closet.

Once your physical safety is granted, you can start thinking about the physical safety of your plants. The risks for them can occur in the form of excess of heat, and heat can be a hazard particularly if you are using HID (HPS, MH) lights. With fluorescents it is difficult to actually burn a plant (you would have to place the plants a mere inch or less from the light in order to burn the leaves with a 125W CFL) but you CANNOT position HID lamps too close to the plants or they will burn and wilt. At the same time we know that the intensity of light radiation decreases with the square of the distance, so you want to be able to hang the lights (or to raise the plants) in a position where you have the optimal balance between proximity to the light and protection from excess heat.

As said before, seedlings growing under fluorescent tubes can be safely placed three or four inches below the tubes (try to keep the distance below a foot) so they can use light properly.

For mature plants growing under HID lights, a general guideline for the proper hanging/positioning height of the lamp would be from 12 to 48 inches depending on wattage. That is, 12-24 inches for low watt systems (up to 150W), 18-36 inches for medium watt systems (200-400W) and at least 24 inches for high watt systems above 400W. However, the particular characteristics of the plants you are growing might have the last say in this.
When in doubt, just check for excess heat at the top of your plants by placing your hand palm down over the plants. If the top of your hand is hot, you need to move your lamp higher.

A very convenient device to add, specially in the case of high-wattage lighting systems in closed spaces, is a good exhausting fan. I'll talk a little about ventilation in a future post.

Other things to keep in mind related to lights placement are phototropism (see post #3) and the convenience of using reflective materials in the sides or walls of your grow space to maximize the number of photons reaching the plant. Mylar is a top option, but just white paper or paint will show excellent reflective properties. Just be careful when using tin foil, specially if it's wrinkled, because the irregular reflection of light might cause hot spots that could leave burn marks in the plant leaves.

You also have the possibility of using (or designing yourself) a system for the lights to move or rotate periodically, to evenly reach every corner in your plants, but honestly I have no experience with those and I think that proper light placement and orientation should be enough. But of course, experimenting is great and you might make lighting discoveries for particular plant species, so definitely try, learn and report.


So, in summary – unless you are willing to roll up your sleeves and learn about LED lighting (and you have some real money to spend) you should use fluorescent, MH or HPS lamps for indoor gardening. Choose which type of lamp suits better the needs of your plants following the information you have, calculate the power you need in order to energize your plants according to the garden surface to light up, get a proper ballast if your lamp needs it, deploy the fixtures in an electrically safe and effective way, set the photoperiod using a programmable timer, and you are good to go Wink
 
Vodsel
#17 Posted : 11/15/2012 9:57:50 PM

DMT-Nexus member

Senior Member | Skills: Filmmaking and Storytelling, Video and Audio Technology, Teaching, Gardening, Languages (Proficient Spanish, Catalan and English, and some french, italian and russian), Seafood cuisine

Posts: 1711
Joined: 03-Oct-2011
Last visit: 20-Apr-2021
Updated the last post with some needed info about CMH lamps timely suggested by Shaolin.

Thanks everyone for the feedback, and please let me know about any inaccuracies I wrote. Contribute and grow Thumbs up
 
wearepeople
#18 Posted : 11/15/2012 10:58:49 PM

DMT-Nexus member

Senior Member

Posts: 1843
Joined: 28-Jun-2012
Last visit: 20-Jul-2021
Vosdel, this is amazing and comprehensive!

Well done!

+ ---- + ---- + ---- + ---- + ---- + ---- + ---- + ---- DMT Nexus Research ---- + ---- + ---- + ---- + ---- + ---- + ---- + ---- +
 
Ice House
#19 Posted : 11/16/2012 1:49:28 AM

DMT-Nexus member

Moderator | Skills: Sustainable growing

Posts: 2240
Joined: 20-Oct-2009
Last visit: 23-Feb-2023
Location: PNW SWWA
Vodsel thank you for puting together such a wonderful and necessary thread.

Great Job!

Ice House
Ice House is an alter ego. The threads, postings, replys, statements, stories, and private messages made by Ice House are 100% unadulterated Bull Shit. Every aspect of the Username Ice House is pure fiction. Any likeness to SWIM or any real person is purely coincidental. The creator of Ice House does not condone or participate in any illicit activity what so ever. The makebelieve character known as Ice House is owned and operated by SWIM and should not be used without SWIM's expressed written consent.
 
phyllode
#20 Posted : 11/16/2012 1:49:40 AM

DMT-Nexus member


Posts: 103
Joined: 29-Oct-2012
Last visit: 14-Jan-2014
Location: Paris, Texas
A1 Thread Vosdel! You must work for the plantsVery happy .
 
123NEXT
 
Users browsing this forum
Guest

DMT-Nexus theme created by The Traveler
This page was generated in 0.242 seconds.